Most people think smart homes are all about fancy gadgets on the main floor, but the real test of a smart setup often starts in the basement. If you want a tech friendly, future ready space, you need to treat that lower level like a small data center with furniture, not just an extra TV room. The short version: before you talk colors or furniture with a Basement Remodeling Contractor, plan your low voltage wiring, network layout, power circuits, and ventilation like you would plan hosting for a high traffic site. Smart devices are only as good as the wiring, network, and power hiding behind the walls.
So, yes, you can throw a Wi‑Fi mesh node in the stairway and call it a day, but that is usually how you end up with laggy streaming, glitchy automation, and random reboots. If you want a smart basement that feels stable, you treat it like infrastructure. Run ethernet, give your rack real power, protect key gear with UPS units, and leave access panels where future you can reach everything. The design part is the fun bit, but the wiring map and device layout are what keep things from turning into chaos six months later.
I learned this the hard way in my own house. I was so focused on the theater wall and lighting scenes that I skipped a structured plan. Two years later I had four different hubs, three power strips, and a tangle of cables behind a drywall panel that no human arm could reach. It worked. Kind of. But it was fragile, and every reboot felt like rolling the dice.
Start with the infrastructure, not the gadgets
Your basement is the closest thing you have to a local server room. You might not think about it that way, but once you start storing network gear, NAS drives, home hubs, and charging stations, the comparison is not far off.
Before you pick devices or brands, sit down with a simple checklist:
- How will you connect everything to your network?
- Where will your main hub or rack live?
- How much conditioned power do you need?
- Where will the heat from equipment actually go?
- How will you reach cables and gear when something breaks?
If you treat your basement like a mini data center first and a lounge second, the smart features tend to work longer and break less.
Think of it like planning for a new web project. You do not start with logos and animations. You start with hosting, bandwidth, security, and backups. The same mindset works nicely here.
Low voltage and network planning
You can run a smart home over Wi‑Fi only, but I would not recommend that for a finished basement. Too many devices fighting over wireless bandwidth is like putting all your heavy workloads on a tiny shared hosting plan.
Here are the main wiring questions your contractor should be ready to talk through:
- Where is your modem / router / gateway today?
- Will you centralize network gear in a basement closet or rack?
- How many ethernet runs do you want in each zone of the basement?
- Do you plan to add cameras, PoE access points, or wired sensors later?
If you like tables, this simple map can help you and your contractor get on the same page:
| Location / Zone | Recommended Ethernet Drops | Common Uses |
|---|---|---|
| Media wall / TV area | 2 to 4 | Smart TV, console, streaming box, AVR |
| Desk / office nook | 2+ | PC, VoIP phone, printer, extra AP |
| Ceiling (center of space) | 1 PoE | Access point |
| Equipment closet / rack | 4+ (home runs) | Switch, NAS, hub, router |
| Exterior wall near entry | 1 | Future camera or smart lock hub |
If your contractor shrugs when you bring up ethernet or PoE, that is a small red flag. They do not need to be a network engineer, but they should at least be comfortable pulling low voltage lines, labeling them, and leaving a proper panel or rack point.
Wi‑Fi coverage from the basement
Many people tuck the router in a random corner of the basement. That can work, but it often gives poor coverage upstairs. For smart homes, you want solid coverage across all floors and outside where you might have cameras.
Ask your contractor to:
- Run ethernet from your main network point to at least one ideal ceiling spot for an access point.
- Avoid dense obstructions directly above the AP, like metal ducts or concrete beams.
- Plan for at least two AP locations if your house is large or has thick walls.
Good Wi‑Fi should feel boring. If you are talking about it every day, it probably means the design was an afterthought.
If you come from the web hosting world, this will feel familiar. Wireless is a shared resource. The more you can offload to wired connections, the better your whole “network” behaves under load.
Power, circuits, and surge protection for smart gear
Smart basements like power. A lot of it. TVs, AV receivers, amplifiers, consoles, PCs, lighting transformers, networking gear, and sometimes server hardware or homelab rigs. If you have ever popped a breaker by accident, you know it is not just annoying. It can also corrupt data on a NAS or force a hard reboot of devices that really do not like sudden outages.
Talk circuits before drywall
Ask your contractor and electrician to map real circuits instead of just guessing. A simple table can help guide the talk:
| Zone | Recommended Circuits | Notes |
|---|---|---|
| Network / equipment closet | Dedicated 15A or 20A | Keep network gear on a clean circuit with a UPS |
| Media wall | 1 to 2 separate circuits | Large TVs and amplifiers pull real power |
| General outlets | 1+ shared circuit | Chargers, lamps, small devices |
| Mechanical room | Existing circuits | Check capacity if you add dehumidifiers or fans |
Many homeowners treat electrical like a sealed box: “The electrician will handle it.” That is one area where you might be wrong. Without clear instructions, they will usually build to code, not to your smart home plans. Code is a floor, not a smart spec.
UPS, surge, and “always on” gear
Anything that runs your home automation logic, data storage, or security devices deserves better power.
At a minimum, plan for:
- One good quality UPS for your modem, router, switch, and main smart home hub.
- Whole house surge protection, or high grade surge strips at equipment clusters.
- Clear separation between always on gear and casual use power strips.
If you run a homelab, self host services, or run a serious NAS, you already think like this. The only twist with a basement remodel is that once the walls are up, it is harder to fix poor outlet placement.
If your smart home stops working when someone plugs in a space heater, you underplanned the electrical side.
Ask your contractor where they plan to place outlets relative to gear. Wall mounted TVs, projector ceilings, motorized blinds, and even some smart lighting systems all need thoughtful outlet positions. A few inches off can mean ugly exposed cords or constant use of extension cords.
Ventilation, noise, and heat management
People who enjoy servers, NAS units, and network gear know one common truth: everything that computes also heats and hums. Basements help with temperature, but they are not magic. Enclosing active gear in tiny closets without fresh air can shorten life and cause random crashes.
Where to put the “server corner”
If you plan a network rack, NAS, or even just a big AV receiver stack, talk placement early.
You want a spot that is:
- Close to your main cable or fiber entry, if possible.
- Near an existing mechanical area to keep noise away from living space.
- Easy to reach from both front and back with a door or removable panel.
Then talk about airflow. At a basic level:
- A small louvered door or vent near the bottom and top of the closet can help.
- In tight spaces, a quiet exhaust fan tied to a thermostat is worth considering.
- Leave open space above and around the rack, not a tight box to the ceiling.
I made the mistake once of cramming an AVR, NAS, and switch into a pretty cabinet with no vents. It looked clean for the first month. After that the gear started to run hot, fans roared, and I ended up drilling messy holes from the back. Much harder to fix later.
Noise vs comfort
There is a small tradeoff here. You want gear out of the way, but if you put it too close to bedrooms or quiet spaces, fan noise can be an issue.
Think through:
- Do you care if you hear a faint hum in the theater area while watching TV?
- Will kids sleep above the equipment closet?
- Are you running spinning disk arrays or loud switches?
In web hosting terms, this is like picking a data center location. You want performance, but you also care about how it fits your other needs. For a home, noise is part of that tradeoff.
Lighting control, sensors, and scenes
Lighting is where most smart basements either shine or feel overdone. You can overload the space with scenes, colors, and automations that sound clever on paper but feel annoying day to day.
Pick a control method and commit
You have three main smart lighting approaches:
- Smart bulbs in regular fixtures
- Smart switches or dimmers with standard bulbs
- Low voltage or strip lighting with dedicated controllers
Mixing all three is possible, but it increases complexity. Firmware updates, app overload, and family confusion are real. Try to pick a primary strategy, then use the others where they truly add value.
Some quick notes:
| Method | Pros | Cons |
|---|---|---|
| Smart bulbs | Easy color and temp control, flexible per fixture | Require power always on, wall switch confusion |
| Smart switches / dimmers | Feels natural, keeps physical control, works with normal bulbs | Deeper electrical planning, needs neutral in many cases |
| Low voltage strips / spots | Great for accents, stairs, coves, and shelves | More planning, drivers and controllers to hide |
For most basements, smart switches plus a few accent strips give a good balance. Ask your contractor to confirm neutral wires where you want smart dimmers. Many older houses are missing them, and fixing that after drywall is painful.
Sensors and automations that are actually useful
The best automations are boring and consistent. A few ideas that rarely annoy people:
- Motion based low level light for night trips to the basement, especially at the stairs.
- Occupancy based lighting for storage rooms and closets that people forget to turn off.
- Humidity based fan control in laundry or bathroom areas.
- Time based scenes that shift color temperature through the day.
If an automation surprises you in a bad way more than once a week, either the trigger is wrong or the rule is doing too much.
Discuss sensor locations with your contractor before insulation. Running a tiny low voltage cable for a recessed motion sensor is cheap while the ceiling is open, and frustrating once it is closed.
Media, home theater, and acoustics
Most people who remodel basements want at least some kind of media space. That may be a full theater, or just a wall mounted TV with a decent sound system. Either way, tech planning up front saves headaches.
Cable paths and display choices
Think about what you want at the display location, even if you are not ready to buy all the gear today.
Common items:
- TV or projector
- Soundbar or full AVR with speakers
- Game consoles
- Streaming boxes or HTPC
Ask your contractor to:
- Run at least 2 HDMI rated conduits or pull lines from the rack or cabinet to the display wall.
- Provide ethernet at the display, not just Wi‑Fi.
- Include power outlets at both standard height and behind wall mounts.
Even if wireless video gets better, a simple conduit can save you when standards change. Pulling a new cable through a pre installed path beats opening walls later.
Sound and neighbors in the house
Sound isolation is one area people regret cutting. Bass in particular loves to travel into bedrooms.
Some steps that help:
- Insulated interior walls around the theater area.
- Double drywall with damping compound on ceilings under bedrooms, if budget allows.
- Solid core doors for theater or loud rooms.
- Decoupled ceiling channels where sound control really matters.
From a tech perspective, a quieter room also helps you enjoy subtle audio from high quality speakers. It is the same idea as hosting a high quality stream on a stable server instead of a noisy, overloaded environment. The signal comes through more clearly.
Smart HVAC, climate, and moisture control
Basements have their own microclimate. They are cooler, sometimes damp, and often tied closely to the main mechanical systems. When you add smart tech, you may introduce extra heat loads from gear and different use patterns.
Zoned control and vents
Talk to your contractor and HVAC tech about how the basement ties into the rest of the house. A few questions help nudge the talk in a better direction:
- Is the basement on its own thermostat or sharing with an upper floor?
- Can you add a smart thermostat for better scheduling?
- Are there dampers that can be controlled to balance airflow?
If the basement tends to run colder, a smart thermostat with remote sensors in key rooms can help the system react better. It is similar to monitoring load on different servers instead of just looking at an average.
Humidity and water sensing
Tech gear does not enjoy damp spaces. For basements, I would always plan for:
- At least one smart humidity sensor, tied to notifications or fan control.
- Smart leak sensors near sump pumps, water heaters, and under sinks.
- A good quality dehumidifier with a proper drain, not just a bucket.
These are boring devices, but they can save you from unpleasant surprises. Think of them like uptime monitors. You hope they never alert you, but you are glad they exist when something goes wrong.
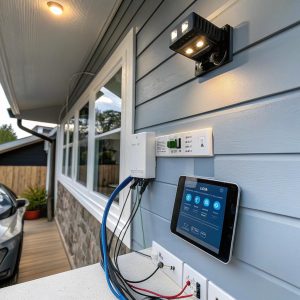
Security, access, and cameras
If you store equipment or high value gear in the basement, you should treat security as part of the tech plan, not an afterthought.
Access control and doors
You do not need a full badge system, but a few small steps help:
- Consider a smart lock on any direct basement exterior door.
- Use solid core doors for equipment rooms with simple keyed knobs.
- Keep any visible windows harder to reach from outside, or use laminated glass.
Smart locks and sensors add convenience, but they also add failure modes. Batteries die. Firmware breaks. Try to keep a physical fallback option for every smart access point.
Cameras and privacy
If you plan cameras inside or outside near basement entries:
- Run structural cables to likely camera points while walls are open.
- Group outside camera cables at a safe interior junction box before reaching the network closet.
- Think about where video is stored: cloud, local NVR, or NAS.
Some people like cameras everywhere. Others find them intrusive. If in doubt, pre wire the spots and cover them with blank plates. You can always add the devices later.
Choosing a contractor with real smart home awareness
Here is where many projects succeed or fall apart. A contractor can build a beautiful basement but still struggle with the tech parts. That does not mean you need a “smart home only” specialist, but you do want someone open to plans, diagrams, and a few extra steps.
Questions to ask before you sign
You do not need to be harsh. Just direct. Some helpful questions:
- How do you normally handle low voltage wiring and labeling?
- Are you comfortable installing conduits for future cable runs?
- Can we plan separate circuits for network gear and media equipment?
- Are you ok working with a third party AV or network installer if needed?
- Will you provide photos of walls and ceilings before closing them?
Those answers tell you a lot about whether they think ahead or treat tech as a last minute patch. You are not asking them to be a system architect. You just want them to respect the plan.
Documentation and “future you”
One habit from web and server work that carries over nicely is documentation.
Ask for:
- Photos of every wall and ceiling after rough wiring, clearly labeled per area.
- A simple diagram of circuits and breakers serving the basement.
- A list of low voltage cable runs with endpoints marked.
Store that info near your rack or panel. Five years from now, when you upgrade, that folder will feel like gold.
Smart home platforms, hubs, and vendor sprawl
This part can be a bit opinionated. Plenty of people chase every new smart device and wind up with five apps that barely talk to each other. You might be smarter to pick a platform early and stick to it where you can.
Pick a primary brain
Whether you like Home Assistant, Apple Home, Google Home, Amazon, or another system, most smart basements benefit from one “brain” that ties devices together.
Questions to think through:
- Do you prefer local control, or are you comfortable with cloud dependence?
- Will everyone in the home be fine using the same platform?
- Does your chosen system support the protocols you care about, like Matter, Zigbee, or Z‑Wave?
For a tech comfortable crowd, something like Home Assistant running on a small server or Raspberry Pi style board in the basement can work well. You place it near your main network gear, protect it with a UPS, and treat it like a low power host.
Device sprawl and app fatigue
This is where many setups feel messy. Every new gadget brings a new app, login, and cloud service.
Try to:
- Favor devices that support your main platform directly.
- Group buying decisions, so you do not mix five brands for the same category.
- Keep a small list of “approved” brands that work well together in your environment.
This is not about loyalty to a vendor. It is more like standardizing your server OS or control panel. Less variation, fewer surprises.
Backup, monitoring, and digital hygiene for your basement tech
If your basement hosts real data storage, cameras, or control systems, you should apply the same habits you use for online projects.
Data and configuration backup
Some basics that help avoid long nights:
- Back up NAS data to at least one other location, cloud or physical.
- Export and store configuration for your smart home hub regularly.
- Keep a text file or document with device IPs, passwords, and wiring notes, stored in a safe password manager.
This might feel overkill for “just” a home setup. But if you use the space for work, host anything yourself, or run cameras, a bit of discipline here can save you a lot of recovery time.
Basic monitoring for home systems
You do not need full enterprise monitoring, but some visibility helps.
Easy wins:
- Battery alerts on smart locks, sensors, and leak detectors.
- Online/offline pings to your main hub and NAS.
- Simple temperature and humidity logs for the equipment closet.
Once you start thinking of the basement like a physical layer for your digital life, if that phrase is not too grand, these checks feel normal, not obsessive. They tell you when something is starting to drift before it becomes a failure.
Common mistakes to avoid in smart tech basements
To keep all this grounded, here are a few patterns that come up over and over.
- Relying only on Wi‑Fi with no wired runs at all
- Piling all gear in a closed cabinet with no airflow
- Putting network gear on a heavily shared circuit with heaters or large appliances
- Skipping documentation and photos of hidden wiring
- Buying every new gadget without thinking about platform or long term support
- Ignoring humidity and water risk in favor of more visible upgrades
- Overcomplicating automations so that lights and scenes surprise people
If something would seem reckless in a small server room, it is probably not wise in a smart basement either.
You do not need perfection. You just want to avoid the predictable traps that turn a clean design into a noisy, unstable cluster of boxes and cables.
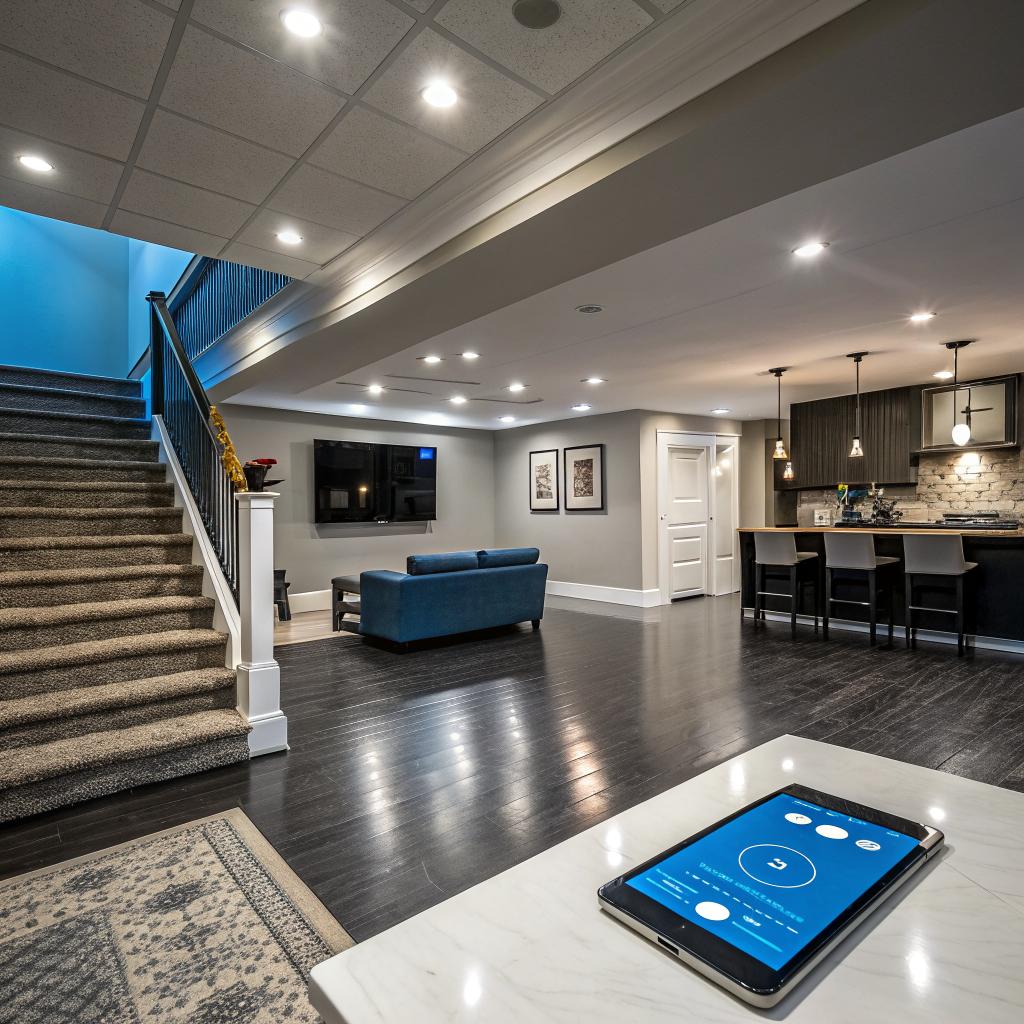
Practical example: turning a plain basement into a smart, tech aware space
To bring this all together, imagine a typical unfinished basement that you want to turn into a mixed use area: small office, media zone, workout corner, and some storage.
Here is a simple flow you might follow with your contractor:
1. Map zones and gear
You sketch where you want:
- Desk and monitors
- TV and speakers
- Equipment closet
- Workout spot with maybe a smart bike or treadmill
You list the gear you either have or might want in the next 3 to 5 years. Nothing fancy, just enough to guess outlets and ethernet drops.
2. Plan wiring and power
You decide:
- All key gear and desk machines get ethernet.
- Access point in the basement ceiling, central position.
- Dedicated circuit for equipment closet with UPS.
- Two circuits for the media wall area.
Contractor marks these on the framing before rough in.
3. Lighting and scenes
You pick:
- Smart dimmers for main ceiling lights across zones.
- Low voltage strip under the step at the bottom of the stairs.
- Occupancy sensor in the storage area.
You plan two main scenes: “Work” with brighter, cooler light near the desk, and “Relax” with warmer, dimmer light across the room. You keep it simple on purpose.
4. Ventilation and noise
You place the equipment closet near the mechanical room, not next to the office wall. Add vented door slats and a quiet exhaust fan that kicks on when the closet gets warm. Nothing fancy, just functional.
5. Documentation and testing
Before drywall, you walk the space with the contractor, take photos, and label them. When the basement is finished, you test:
- Wi‑Fi coverage from the new AP.
- Ethernet drops at every planned point.
- Scene changes for lighting in both daytime and night use.
This example is modest. No giant racks or crazy automation. Still, because the base layer is clear, you can add smarter devices over time without ripping things apart.
Common questions about smart tech basements
Q: Is wired ethernet really worth it if my Wi‑Fi is strong?
A: For a few light devices, Wi‑Fi alone is fine. Once you add a media setup, a home office, or any homelab style gear, wired links reduce congestion and give you more stable performance. It is like moving high traffic services to a better hosting plan while leaving casual browsing on shared space.
Q: Do I need a dedicated server rack, or is a shelf enough?
A: A small rack helps if you have multiple devices, but a well ventilated shelf can work for modest setups. The real keys are airflow, tidy cabling, and some physical separation from everyday clutter. If you already imagine adding more gear later, a small rack is often worth it.
Q: Are smart switches safer than smart bulbs, or the other way around?
A: Both can be safe when installed correctly. Smart switches fit better for shared spaces like basements, because anyone can walk in and use them intuitively. Bulbs work well for lamps and accent spots. Many people find that most ceiling lights on smart switches plus a few accent bulbs is a good balance.
Q: How much should I spend on smart tech compared to the rest of the remodel?
A: You do not need to overload the project with gadgets. Putting 5 to 15 percent of the basement budget into wiring, power, and core devices is usually enough for strong infrastructure. That budget often pays back over time by reducing rework and giving you room to grow.
Q: What if my contractor is good at construction but not at tech?
A: That is common. You can still succeed if they are open to simple plans, are willing to pull low voltage lines where marked, and are fine with you or a specialist handling the final device setup. The most serious problems come when a contractor dismisses tech needs outright. If that happens, it might be time to look for someone more flexible.

