Most people think a smart office starts with buying new gear: standing desks, smart lights, new monitors, the latest Mac, maybe some acoustic panels. I used to think that too. Then I tried upgrading my own small office, and the first real upgrade was not something I bought. It was everything I removed.
The short version: if you are trying to build a smarter office for tech work, hosting, remote teams, or community projects, start by clearing physical junk first. Old servers, dead monitors, cables, broken chairs, half-assembled racks, packaging, and random hardware slow you down, take space from real infrastructure, and even affect how people think in that room. A focused clean out, often with a local service such as junk removal Boston MA, gives you more usable square footage, better airflow around gear, a cleaner layout for power and network runs, and fewer fire risks. Once the clutter is gone, it is much easier to plan upgrades like better network topologies, smarter cable paths, and actual comfort for humans.
I know that sounds almost too simple, maybe even boring. But in a tech setting, clutter hides problems. Dusty UPS units that no one trusts anymore. Floor-standing towers that nobody has logged into in three years. Cardboard boxes stacked in front of the one outlet that could have powered a proper rack. I have seen places that pay for extra cloud storage while sitting next to boxes of unused drives.
So, let us walk through smart office upgrades from a tech-minded view, but starting with junk and space instead of gadgets and hype.
Why clutter is a real tech problem, not just a visual one
A messy office does not only look bad. It changes how you design networks, where you place machines, and how staff move around. It even changes uptime risks.
Here are a few common patterns I keep seeing in small web agencies, hosting resellers, and community labs:
- Old towers and mini PCs stacked in corners, still on, still plugged in, running forgotten cron jobs.
- Cardboard boxes from past hardware orders blocking airflow to power strips and switches.
- Mixed power cables, HDMI, DisplayPort, and Ethernet all in one big tangle under shared desks.
- Broken chairs, dead printers, and unused filing cabinets parked near the only spot that can hold a proper rack.
- Portable AC units trying to cool both humans and random hardware stuffed into the same room.
Tech people like to say everything is “in the cloud” now, but the physical side does not disappear. You still have:
– Routers
– Switches
– Cables
– Power strips
– Laptops
– Monitors
– Backup drives
If that gear lives in a cluttered space, your risk profile is worse than it needs to be. Tripped cables. Barred exits. Overloaded outlets. Dust in fans.
If you treat your office like a storage unit, do not be surprised when it behaves like one: hard to navigate, hard to secure, and hard to scale up cleanly.
I would argue that for any serious digital work, “junk” is part of your tech stack. You are either managing it, or it is managing you.
Step 1: Define what junk actually is in a tech office
Before you start calling any removal service or moving boxes, you need a clear rule set. Tech people are good at hoarding, often “for testing” or “just in case”. The line between backup hardware and actual junk can feel blurry.
Classifying what should stay and what should go
A simple rule that works in many offices:
- If a device has not powered on in 18 months, treat it as junk unless there is a clear project waiting for it.
- If nobody can say what is stored on a drive, it should either be securely wiped and reused or destroyed.
- If a cable is damaged or unknown and takes more than a minute to identify, bin it.
- If furniture is broken, uncomfortable, or blocking movement, it is not “backup” furniture, it is clutter.
Sometimes it helps to use a small decision table during a clean out:
| Item type | Key question | Action |
|---|---|---|
| Server / PC | In use in last 12 months? | If yes, document and keep. If no, plan migration or disposal. |
| External drive | Do you know what data is on it? | If yes and needed, back up and label. If no, mount, check, then wipe or destroy. |
| Network gear | Is it part of current topology? | If not, keep only if it has a clear future role. |
| Furniture | Does anyone use it weekly? | Unused or broken items move to the removal pile. |
Of course, there will be edge cases. That one old firewall you still like. The USB audio interface that is handy after all. This is where you do not want to be too rigid. Allow a small “maybe” shelf, but time box it. If an item is still on the “maybe” shelf six months later, it is not a maybe.
A practical heuristic: if your future self is the only one who might need an item, ask yourself if your future self will even remember that it exists.
Digital hoarding vs physical hoarding
People talk a lot about digital clutter: too many tabs, old Git branches, ancient backups, or email sprawl. But physical clutter can block digital improvements.
For example:
– You might delay switching from old on-prem mail to a hosted solution because the physical mail server is still sitting in the corner, humming along, and nobody wants to disturb it.
– You might avoid upgrading your network design, just because the wall with your best conduit path is blocked by stacked boxes.
– You might let cable management spiral, since crawling under the desk means climbing over random junk.
So, before thinking about better hosting providers, shared environments, load balancers, or high availability, free your cables and power runs from chaos. The infrastructure you can touch matters more than the one you cannot.
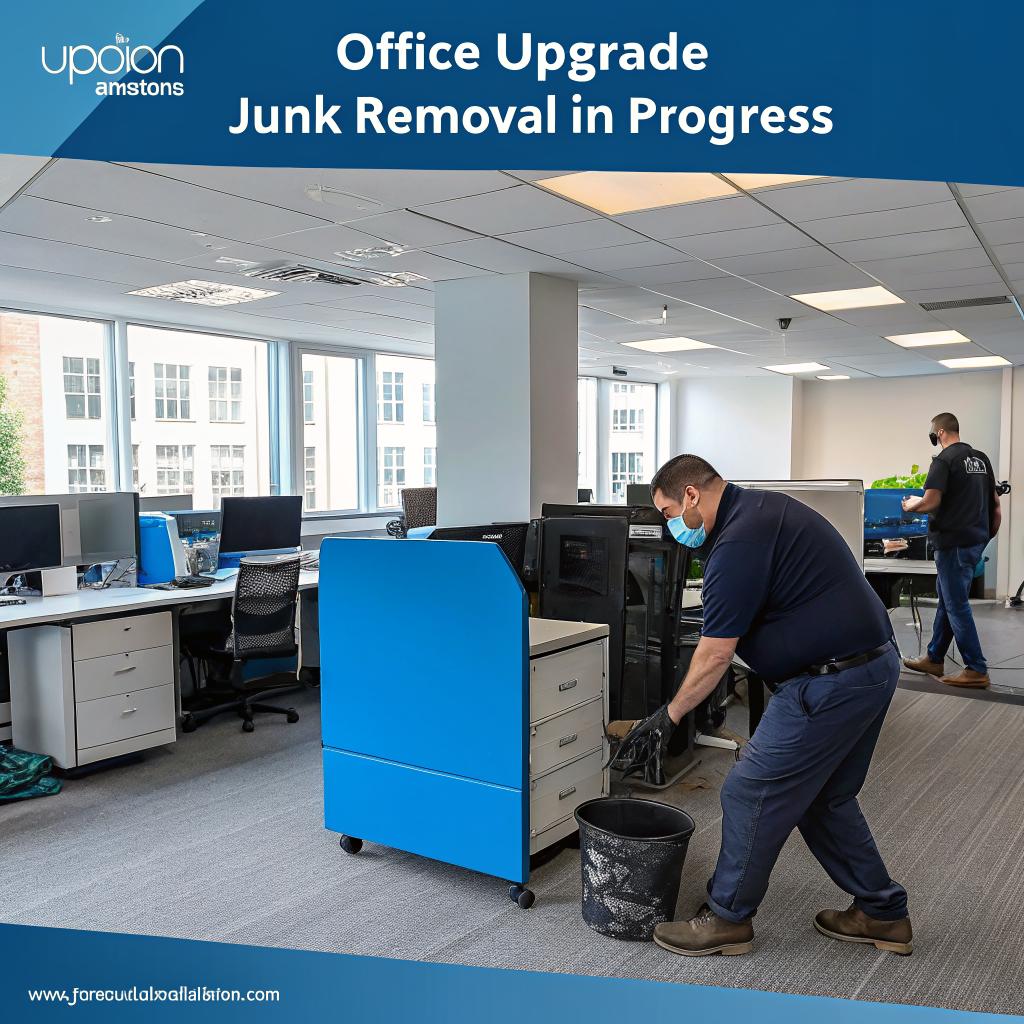
Step 2: Use junk removal as part of office planning, not as an afterthought
Many teams treat junk removal like an emergency fix when things get too crowded. It works better if you treat it like part of your upgrade plan.
Mapping your office like a mini data center
Even if you mainly host sites on someone else’s servers, your own space is still a critical point:
– Routers and firewalls
– Dev machines
– Staging hardware
– Monitors
– Storage for documents or hardware
Try to sketch your office like a simple DC diagram. Not fancy, just enough to see:
- Where power comes in
- Where your network demarcation point is
- Where the main switches or routers live
- Where people sit relative to WiFi or cabling
- Where you store spare gear and packaging
Once you see this on paper, junk becomes obvious. The random couch that blocks the best wall for a wall-mounted rack. The tall cabinet in front of the only spot with enough room for a standing desk plus cable tray.
This is where a planned removal session comes in. Instead of dragging a chair out every time you trip on it, block out a day, mark everything that is in the way of a better layout, and send it out in one go.
Treat junk removal like a migration window: prep, schedule, execute, then verify the new state of your space.
Why use a dedicated junk removal service
You can try to do it with a borrowed pickup and a few friends, but that often leads to:
– Partial cleanouts that leave the worst items behind
– No proper handling of e-waste
– Data-bearing devices tossed in with general trash
– Staff losing a full day of work to hauling instead of building or coding
A local service that already handles office and e-waste can:
– Take large loads in one trip
– Handle old furniture, mixed junk, and electronics at once
– Sort or direct e-waste to proper channels
Plus, they are often faster than you expect. The thing to watch is data security, which we will get to later.
Step 3: Plan your “post junk” smart office layout
Once you commit to clearing out a large chunk of your office, you get a rare chance: you can rethink the layout from scratch, almost like moving into a new place.
Map your technical priorities first
Before you think about plants or art, ask some basic tech questions:
- Where should your main router, switch, and modem live to reduce cable runs and mess?
- Do you need an actual rack, or will a small wall-mounted unit be enough?
- Where do you want your WiFi coverage to be strongest?
- Which desks need wired Ethernet, and which can be WiFi only?
- Where can you place power strips so no one has to stretch cables across walkways?
By clearing junk first, you actually have options. You do not need to accept the one corner that is not filled with broken chairs. You can place people and equipment in a way that makes sense for:
– Network stability
– Noise levels
– Heat and airflow
– Ergonomics
Example layouts for digital and hosting work
Let us say you run a small web hosting reseller operation plus a dev team of 6. You might divide your space like this:
| Zone | Purpose | Smart upgrade moves after junk removal |
|---|---|---|
| Network corner | Router, switch, modem, UPS | Wall-mount a small rack, run short patch cables, label ports clearly. |
| Developer desks | Daily coding, staging tests | Add cable trays under desks, use mounted power strips, set up dual monitors without floor cables. |
| Meeting / calls area | Client calls, video meetings | Dedicated clean backdrop, noise-treated corner, no boxes in the background. |
| Storage wall | Spare hardware, labeled bins | Simple shelving with labeled containers for cables, parts, and devices, instead of random piles. |
Without clearing junk, each of those zones ends up overlapping. Junk removal gives you clear lines between them.
Step 4: Treat e-waste and hardware with respect
The tricky part for tech offices is not old chairs. It is drives, boards, and mixed electronics. You have risk on two fronts: data leakage and environmental impact.
Data bearing devices: wipe, drill, or destroy
Before any removal team touches your drives, do a pass yourself. Items to flag:
- Hard disks (HDD)
- SSDs
- USB sticks
- Old phones or tablets
- Some printers with internal storage
For each drive, pick one of these options:
– Secure wipe using a known tool and method
– Physical destruction (drilling, shredding, etc.)
– Professional destruction with certification
If you handle client data, think about how you would explain your process in an audit or a serious support email. “We threw it in the trash” is hard to defend.
You do not need to overdo it with home-made rituals, but you need something more than hope.
Coordinate with your removal service
When you book a junk removal team, be clear about:
– What items are safe to haul as regular junk
– What items you will prep or wipe first
– If you expect them to take e-waste to a specific facility
Note that many general junk services will move e-waste, but not process drives securely. That part is still on you. Some offices keep a small “data destruction box” and once full, they schedule a destruction service.
Step 5: Make room for smart gear that actually matters
When you free up floor and wall space, you can invest in upgrades that pay off for tech teams instead of just looking “modern”.
Better network and power layout
Once the old junk is gone, you can do things properly:
- Shorter patch cables between router and switch.
- Labels on every open port and cable end.
- A central spot for your UPS, not hidden behind a stack of boxes.
- Separation between power cables and Ethernet where possible.
These sound like tiny details, but they reduce time wasted on basic troubleshooting. You also cut down the risk of unplugging the wrong device during a hectic moment.
For power, you can:
– Use strips with surge protection and enough spacing for large adapters
– Mount strips under desks instead of letting them float on the floor
– Keep one “clean power” area for your most sensitive gear
Ergonomic and focus upgrades
Once furniture junk is gone, you can design seating for real work, instead of forcing people to fit around what you already owned.
Simple, high impact changes:
- Chairs that do not squeak or wobble during calls.
- Desks with enough space for dual monitors without stacking stands on boxes.
- Clear walking paths so people do not bump cables or towers.
- Predictable places for HDMI and power when someone plugs in a laptop for a demo.
Many “smart office” guides jump straight to IoT sensors and automation. Those are nice in some cases, but if someone has to step over an old printer to reach the whiteboard, you are not there yet.
Step 6: Support remote teams and digital communities better
If you run a digital community or a small hosting business, you probably work hybrid. Some people remote, some in the office. You may think clutter only affects people in the room, but it can bleed into how you serve your community too.
Better recording and streaming setups
Once you remove background junk, you can carve out a simple “studio corner”:
– Clean neutral wall or backdrop
– Stable camera position
– Reasonable lighting
– No random boxes in the frame
From there, you can record:
– Short how-to videos for your hosting clients
– Internal walk-throughs of your deploy process
– Community Q&A calls
A tidy corner for recording improves how your brand looks, even if most of your work happens in a browser.
Shared workstations for local meetups
Many digital community hosts run local meetups occasionally. Having a clear, uncluttered space changes the feel:
- Enough open desks for people who bring laptops
- Access to power that does not require crawling under tables
- No awkward stacks of old machines in the background
When the junk is gone, hosting a small “WordPress clinic” or “hosting best practices” session becomes much simpler. You do not need to rent extra space, you just use what you already pay for.
Step 7: Create a simple “no junk creep” policy
If you stop here, clutter will return. Slowly at first, then quickly. To avoid that, you need a simple habit loop.
Lightweight rules that people can remember
You do not need a manual. Just a few rules:
- All incoming hardware gets labeled with the date and purpose.
- All packaging gets broken down and removed within one week.
- Old gear moves to a marked “review shelf” with a review date written on it.
- Once a quarter, schedule a 1 hour “office audit” to move review items into keep or remove piles.
This way, junk does not blend into the walls. It stays visible as “pending decision”, which is easier to act on.
Culture shift: stop treating clutter as harmless
People tend to think that a few extra boxes or old monitors are neutral. They are not. For tech work, they:
– Steal physical focus
– Take away air and light
– Make cable runs more complex
– Create tripping hazards for clients or guests
– Increase dust near fans and vents
You probably already care deeply about uptime, backups, and redundancy. Physical mess quietly pulls in the opposite direction.
Case style scenarios: where junk removal improved actual work
To make this less abstract, let us walk through a few realistic examples. These are blended from several offices, but close enough to feel familiar.
1. The closet server that blocked better hosting decisions
A small web agency had a single tower in a closet, running an old Linux box with a few legacy client sites. Everyone else was on cloud hosting. The team wanted to move the last projects to a proper managed environment but kept postponing it.
The closet was packed: old marketing stands, dead printers, spare chairs, and piles of cables. Nobody wanted to spend their weekend in that hot, dusty space doing a migration.
After a planned junk removal round, they:
– Cleared the closet completely
– Brought the tower into the main office for better physical access
– Scheduled a migration window, since now it was not hidden behind a wall of junk
Migration happened in a day. The “too hard” project was actually blocked by clutter, not technical difficulty.
2. The dev area where cables failed weekly
In another office, the dev team blamed flaky WiFi and cheap switches for frequent network drops. After mapping the space, the real issue was physical:
– Cables running across walkways
– Chairs rolling over patch cables daily
– Heavy power bricks hanging from short cables, pulling sideways on ports
They ran a removal session and got rid of:
– Two unused desks that blocked direct cable paths
– Piles of boxes under tables that trapped power strips
– Broken monitor stands that forced weird placements
Then they:
– Mounted power strips under desks
– Used cable trays and velcro ties
– Shortened runs from switch to desks
Dropouts fell to near zero. The switch was fine. The environment was not.
3. The “we have no space” meetup host
One community manager who hosted WordPress and dev meetups swore they had no space for any more events. The office “felt full”. Looking closer:
– One entire wall had stacked old event banners and hardware from a past trade show.
– Three broken chairs sat in a corner “waiting for repair” for over a year.
– A large desk was dedicated entirely to old laptops that nobody could log into.
They cleared all that in one removal visit. The same room then had space for:
– A central table for shared hacking
– A side counter with snacks and drinks
– A small recording corner for short tutorial clips
Hosting extra events became practical, not stressful.
Security, compliance, and junk: a quiet risk
If you handle hosting accounts, customer data, or community user info, your physical space is part of your security story. Auditors and serious clients care about this more than it might seem.
What auditors and serious clients look for
Even if you never have a formal audit, imagine someone is visiting on behalf of a large client. They might silently notice:
- Unlabeled drives sitting on open shelves
- Network gear half-buried under boxes
- Random USB sticks on desks
- Old printed documents in plain view
They will not always say something. They might just log it mentally as “weak physical discipline”. That can make them nervous about trusting your shared hosting guidance, your backups, or your incident response.
A clean office is not the same as secure, but disorganized, junk-filled offices rarely have strong processes hiding under the mess.
How to actually run a junk removal day without chaos
A junk removal push can go wrong if it turns into a free-for-all. You do not want someone to accidentally throw away the only copy of an old contract, or a test rig that is still in use.
Simple schedule that works
Try this four phase approach:
- Prep day: Walk through the space with sticky notes or colored tape. Mark items as KEEP, REVIEW, or JUNK. Ask each team member to review their area.
- Decision day: For everything marked REVIEW, force a yes/no call. Either label it and keep it, or move it to the JUNK side.
- Data day: Handle drives and data devices: wiping, backing up, or destroying as needed.
- Removal day: Have the junk removal team pick up the clearly separated JUNK items.
That flow gives you room to avoid regret, while keeping momentum.
Who gets to decide what is junk
This part is tricky. Some people in the office tend to keep too much “because maybe”, others throw away too fast.
A rough rule that helps:
- Network and server gear: final call by whoever owns infra
- Client files and paper: final call by whoever owns operations or legal
- Furniture: shared call, but someone should have veto power if there is a safety angle
- Generic junk (boxes, expired snacks, broken stuff): anyone can tag it as junk
You will not get this perfect. Some decisions will feel wrong later. That is normal. Better a few minor regrets than another year working around dead monitors.
Measuring the impact: is your office really “smarter” now?
After all this, it helps to ask: was the effort worth it? You can use simple, real-world checks instead of big metrics.
Quick indicators that your upgrades worked
Ask your team, or yourself, these questions:
- Can someone new find the router and modem in under 1 minute?
- Can anyone locate a spare Ethernet cable without searching a pile?
- Can you walk across the main room without stepping over cables or boxes?
- Does every active device have a clear space for airflow?
- Does your recording or call area look calm, not chaotic?
If you answer “no” to several of those, there is more to do. If the answers are mostly “yes”, you have probably moved from “cluttered tech cave” toward an actual smart office.
Q&A: Common worries about smart office upgrades and junk removal
Q: What if we throw something out and need it later?
A: You will get at least one decision wrong. People overestimate how often that happens though. Keep a short list of “items we almost regret losing” and see how many times you actually face real harm. In most offices, the benefit of clear space and better layout outweighs the few times you wish you kept an old cable.
Q: Is junk removal just an excuse to buy more stuff?
A: It can be, but it does not have to. A good goal is to replace only what is directly blocking good work. For example, replacing three broken chairs with two solid ones, or adding a compact rack once there is space for it. If your spending spikes on random decor instead of infrastructure, something is off.
Q: We are mostly remote. Does our physical office still matter?
A: Yes, if you use it at all. It shapes how you host local meetups, record content, handle mail and hardware, and bring new people in. Plus, a tidy core space often reflects in how you think about virtual organization. If your main physical hub is chaos, your remote systems usually mirror that in small ways.
Q: Should we prioritize junk removal over upgrading servers or hosting plans?
A: Not every time. If you are hitting real capacity limits on your hosting, address that. But if your main friction is messy desks, confusing hardware storage, awkward cables, and constant physical frustration, clearing junk first gives you a cleaner base for any later upgrades. Often both can move forward in parallel.
Q: How often should we bring in a junk removal team?
A: Think of a big cleanout every 12 to 24 months, with smaller internal tidy sessions each quarter. If your office hosts lots of events or handles frequent hardware turnover, you may need more frequent pickups. Let the flow of hardware and packaging guide you, not the calendar alone.
What would change in your own office if you took one full day to remove everything that is broken, unused, or in the way of a cleaner network and workspace?


